I’m a fan of accessories; they complete our look.
Sometimes accessories can burn a hole in our pockets, because some of the good ones cost more than what we’re willing to spend.
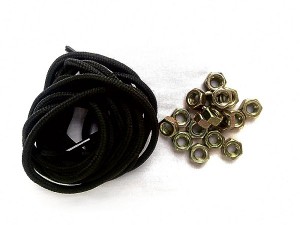
This leads me to my P40-worth DIY ‘Nut’ bracelets. I was on vacation in my hometown, where my father owns an auto supply shop, when I got the idea.
I was looking around the area, and the sight of these nuts and bolts inspired me to make a bracelet.
What you need:
1 Nuts. You can buy these nuts in hardware stores or auto supply shops. For the nuts I used here, I asked my father if I could get 20 of the 6 mm nuts. The price is P2 per nut, but it also depends on the size you want.
3 Scissors.
4 Tying skills and braiding skills. You can ask your sister or your mom to teach you how to braid. Or, last resort—Google.
How-to:
1 Tie a simple knot to keep the three shoelaces to start the braiding process. It’s not very different from braiding human hair, so I’m pretty sure you wouldn’t have any problem learning the technique.
2 Estimate your preferred bracelet length and braid the laces halfway through your desired length, then stop.
4 After inserting the last nut, start the braiding process again, like what you did in the first step. Finish the bracelet by tying another knot at the end.
Note:
Adjust the length of the braid and the number of nuts according to your wrist size, or your preferred fit. Then you’re done.
You can simply tie both ends together when you want to put on the bracelet, like what I did, or you can browse the Internet for other ways to lock your bracelet.
The design of your bracelet is not limited to the materials I’ve shown you here. Look around and think of other things you can pick up and combine with the laces and nuts, so you can make your accessory more personalized and original. Be constantly resourceful and creative.