K-pop princess
 The look: K-pop princesses need to stay fresh and unique-looking all the time, since all eyes are on them. With their countless fans all over the world, K-pop princesses aren’t just trend followers; they’re trendsetters. This look features bright aqua eyes, thick eyeliner with a square wing and gradient-orange lips
How-to: Prep eyes with concealer to help eye color adhere to lids.
Add a cute touch to your eye makeup by extending the color to your cheekbones. Use a stencil template like stars or hearts to create “face stamps.”
To get gradient lips, use a lip stain in coral on the inner part of your lips; keep the outer lips paler in contrast (you can use powder or concealer—blended well—to create contrast.) Or try The Face Shop’s Lovely Me Ex Stamping On My Lips lip stain, which contains a small lip-shaped sponge designed to create gradient lips easily.
K-drama queen
The look: The path to love in a Korean drama is always fraught with tension and crazy plot twists, but in the end, the girl always gets the guy. Long, lush locks, cherry-red lips, expressive  eyes and perfectly arched brows get top billing in this look.
How-to: Almond-shaped eyes tend to have a slanted extension on the outer corner of eyes. If you want eyes to look rounder, pat concealer on the slanted extension to cover it up. Once you’ve covered it up, create a rounder eye shape by using black eyeliner on the top lashline and connecting this to your outer lower lashline.
Do not apply eyeliner on the slanted area that you concealed; apply it a bit closer to your outer eye to create a rounded shape. Finish off the look with an extra pair of thick false eyelashes. Use a cherry-red glossy lip color for a seductive pout that still looks girlish.
Sidebar: Nail it!
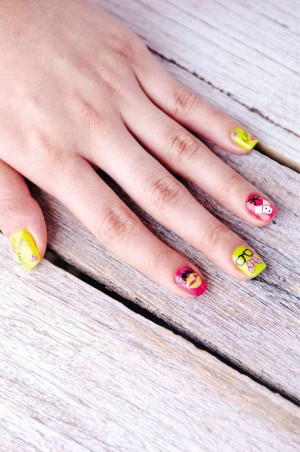
The Face Shop’s new nail stickers will make your tips cute and “gwiyomi-ready” in no time.
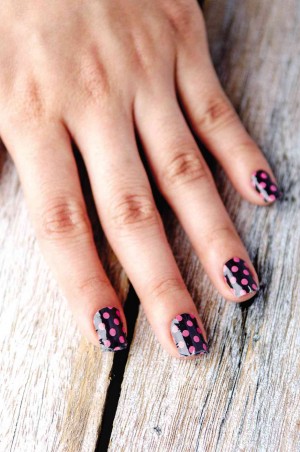
Nail polish is the fastest way to express yourself; it gives people a glimpse of your personality. It’s also one of the most affordable ways to play with color and texture—you can even add nail stickers and use contrasting colors to turn your nails into mini works of art.
Nail art tips
Using nail decals? Choose a base color as your decal’s “colored canvas.” Apply two to three coats of your base color and let dry. Once it’s dry, affix your nail decal (some come in peel-off and stick variants, while others like water-based decals are applied the way you apply a temporary tattoo: Use water and a rubbing technique)
Once you’ve affixed your chosen nail decals, seal your design with a clear top coat. This will help your nail color last longer, too.
Don’t be afraid to mix and match nail decals.
If you love the look of glitter polish but hate the hassle of taking it off with nail polish remover, try nail stickers. These “stick-on” nail polish shades look like the real deal. Apply sticker on clean nails and cut the sticker sheet to size. File away any rough edges. If your nail sticker focuses on design rather than texture, you can also seal it with a clear top coat.
Visit www.facebook.com/thefaceshopphilippines.
Photos: TOTO LABRADOR
Makeup: Jen Abergido
Hair: Melissa Guasch
Nails: Myrna Recamara

