FINDING a perfect gift can be difficult. Sometimes, as cute as a teddy bear may be, its beady eyes and silky fur aren’t enough to convey all your touchy-feely emotions.
The more years you spend together, the more private jokes and secret memories you share. What better way to celebrate this than by giving each other handmade gifts?
Super asked four talented crafters to come up with easy gifts that you can start working on, in time for next week’s lovefest.
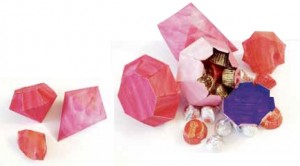
Candy-colored bling boxes by Alessa Lanot
“These will also make really cute place cards for Valentine’s dinner with friends!” says Alessa.
These gem-shaped boxes can house bite-sized sweets or real bling.
Materials:
Thick watercolor paper, watercolor, cutter, printer (optional)
Steps:
1. Paint random brush strokes on the paper.
2. Cut and score the paper to form the 3D diamond. Optional: You can print a template on the back side of the paper as a cutting guide.
3. Stick the panels together with double-sided tape.
Check out Alessa’s other cool projects at www.lifeafterbreakfast.com. Her next crafternoon workshops include calligraphy (Feb. 9) and rubbercutting (Feb. 22). Follow her on Twitter and Instagram: (@alessandralanot).
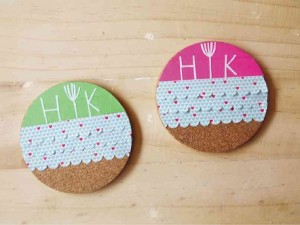
Love coasters by Mansy Abesamis
Mansy Abesamis of Hey Kessy combines washi and paper-cutting to create these cute and easy-peasy cork coasters.
Materials:
Cork board (available at National Book Store), washi tape (available at www.heykessy.com), cutter/X-acto knife, Mod Podge or glue and water solution (mix one part Elmer’s glue with one part water)
Steps:
1. Cut corkboard into circular or square shapes.
2. Use washi as your background; cut to size and create different patterns using different washi designs.
3. Use a cutter with a fine, sharp blade to cut out your initials and other designs.
4. Attach your paper cuts onto the washi’d surface.
5. Seal the entire project with Mod Podge or a glue and water solution. This creates a water-resistant, clear coating over your design.
Visit Mansy at www.heykessy.com to see her washi rolls for sale, along with other crafty materials. She also holds washi and paper-cutting workshops. Her workshop on March 8 combines basic French and crafts. Follow Mansy on Twitter and Instagram: (@heykessy).
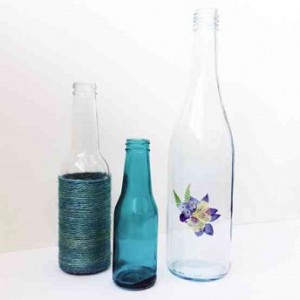
Pressed posies by Mikko Sumulong
Mikko shows the many pretty things you can do with pressed flowers, from a pressed flower bouquet to decorative bottles which can double as a flower vase (use a jar to turn it into a pen or knickknack holder). You can also use additional materials to decorate the bottles—one bottle is wrapped with rope, another is tinted with homemade coloring.
Materials:
Flowers, bottles, Elmer’s glue, food coloring, twine/cord/ribbon, magazines/books, glue gun, spray sealant
Steps:
Tinted bottle:
1. Tint Elmer’s glue (or Mod Podge) with food coloring.
2. Pour generous amount of colored glue inside the bottle; slowly turn the bottle, making sure that the inside is coated with glue.
3. Turn the bottle upside down and let all excess glue drip.
4. Allow to dry overnight.
Wrapped bottle:
1. Using your choice of string (robe, twine, cord, yarn or other thread), wrap the bottle.
2. Use a glue gun or super glue to keep string in place.
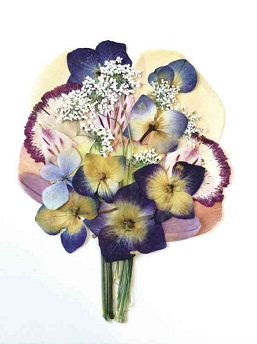
Pressed flowers (bottle/bouquet)
1. Press flowers and leaves inside books or magazines to preserve them (for optimal results dry out flowers six to eight weeks).
2. Plan out your design on a piece of paper.
3. Use a small amount of glue and slowly stick each leaf and flower to the exterior of the bottle or to your chosen surface.
4. Allow to completely dry.
5. Use a spray sealant to protect from damage.
Check out Mikko’s fun DIY projects at www.itrydiy.me. She is holding a pressed flower workshop on Feb. 23, which is perfect to help you turn your Valentine bouquets into long-lasting keepsakes. Follow her on Twitter and Instagram: (@mikkomix).
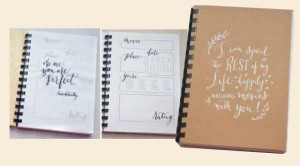
Movie magic by Alexis Ventura
Calligrapher Alexis created a scrapbook for couples who want a memento of their fun times at the movies.
Materials:
1. Calligraphy pen and ink (available at Scribe Writing Essentials), parchment paper, Kraft board, bond paper
Steps:
1. Plan your page. List down which details you want to remember in each page. In this case, Alexis put space for the movie’s title, date, time, place, genre and rating, plus a little extra for quotable quotes and space to affix movie tickets to the page.
2. Lay out the page. You can do it by hand or using Photoshop; Alexis used both, which she then duplicated on the other side for easy photocopying.
3. Add some cheese! Use the parchment paper to add decorative hand-lettered quotes from favorite movies as dividers.
4. Go to a printing shop to have your pages photocopied and bound.
5. Decorate the covers and write a love note.
Check out Alexis’s beautiful scribblings and join her workshops at www.inkscribbler.com. Follow Alexis on Twitter (@alexiscventura) and Instagram (@inkscribbler).


