DIY projects and simple crafty endeavors can provide a catharsis for difficult emotions, giving you a chance to reduce stress while expressing your creative side.
If you’re not artistically inclined, you can still benefit from a creative exercise. The results of a study in Art Therapy: Journal of the American Art Therapy Association, entitled “Reduction of Cortisol Levels and Participants’ Responses Following Art Making,” found that 45 minutes of creative activity significantly lessens stress in the body, regardless of artistic experience or talent.
If you’re looking for some “me” time and a great way to relieve stress, here are some easy DIY projects — straight from the experts — to add a lovely touch to your space.
P.S. If you really want to test your artistic skills, you can also try 12 childhood art techniques that can help adults relieve stress.
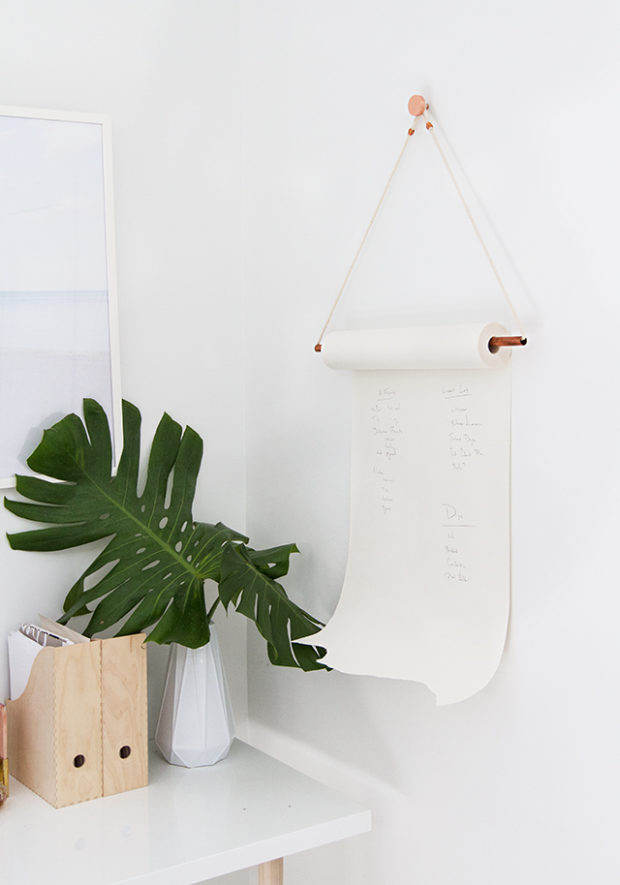
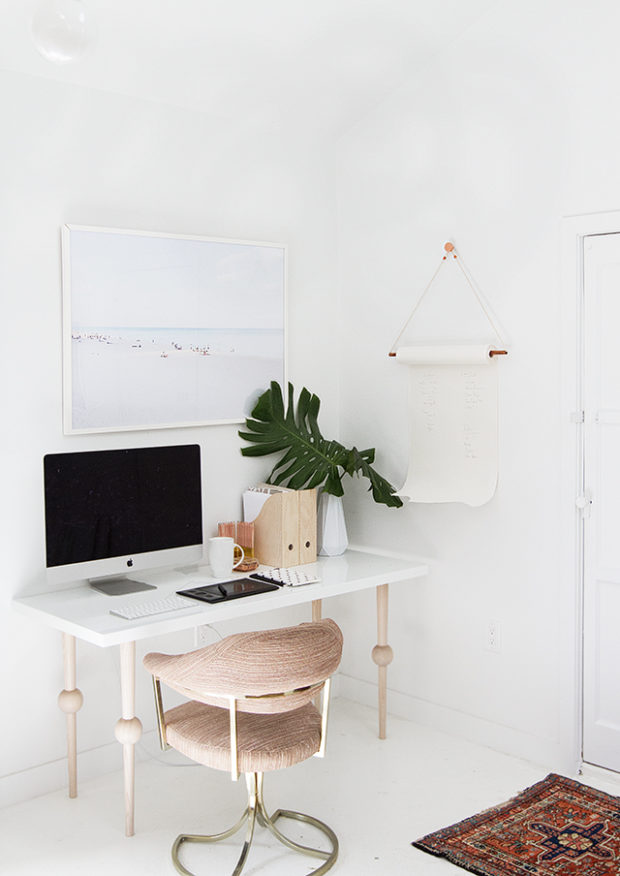
Sarah Sherman Samuel’s Stylish To-Do List
Sarah Sherman Samuel is a Los Angeles-based Interior and Product Designer. A color and pattern expert, she is known for effortlessly combining styles to create distinctive spaces, coveted products, and drool-worthy images. Her works have been featured on Architectural Digest, Domino Magazine, and Sunset Magazine, among others. (Source: sarahshermansamuel.com)
MATERIALS:
- 2′ copper pipe
- 1.25″ copper cabinet pull (mines from Schoolhouse Electric)
- Copper wrapping wire
- Rope
- Hanger bolt
- Drill
- Drywall anchor
- Paper roll
HOW-TO:
Step:1 Thread the copper pipe through the paper roll and then thread approximately 4.5′ of rope through the pipe.
Step 2: Bring the ends of the rope together and make a loose loop at each end.
Step 3: Using the copper wire, wrap the rope tightly to create a loop just large enough to fit over the cabinet pull.
Step 4: Screw the machine screw side of the hanger bolt into the cabinet pull.
Step 5: Using the drill, drill out a pilot hole in the wall and then hammer in the anchor.
Step 6: Screw the cabinet pull with the hanger bolt into the anchor by hand.
Step 7: Hang the two loops over the cabinet pull.
Step 8: Get busy. Write your to-do list and start checking things off because you’re done!
Check out her complete guide on sarahshermansamuel.com
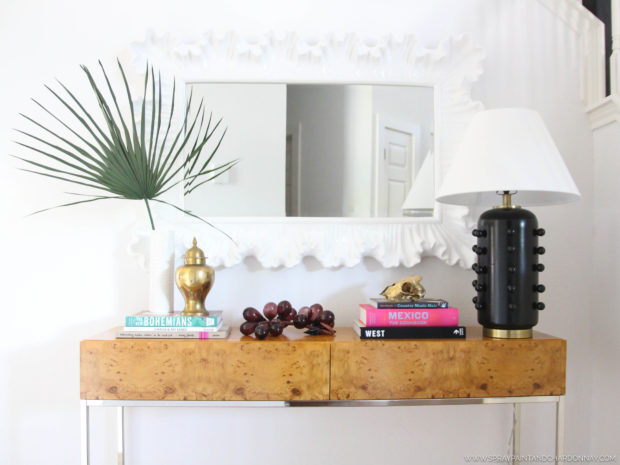
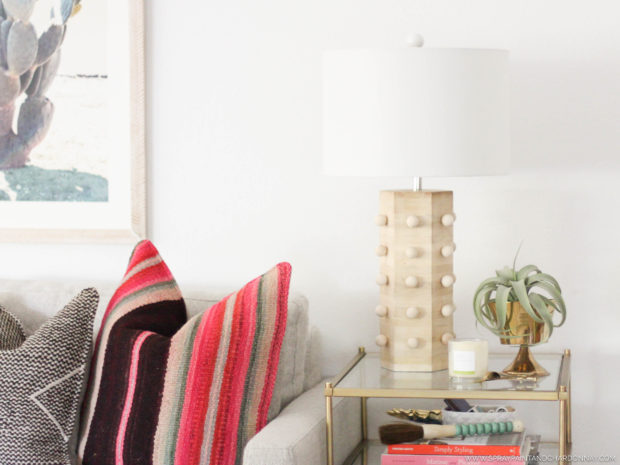
Kelly Wearstler-Inspired Lamp
It’s difficult to resist anything by award-winning interior designer Kelly Wearstler, who’s dubbed by The New Yorker as “the presiding grande dame of West Coast interior design.” You could get the real deal, but since you’ve got a lot of time on your hands, you may as well take on an artsy endeavor that will immediately spruce up your home. As Katie Taylor of Spray Paint & Chardonnay and Katie Taylor Design, LLC, aims to help others create and design beautiful spaces of their own, she came up with an easy guide on how to create your own Kelly Wearstler-inspired lamp. (Note: Using similar steps suggested, why not search for different materials you have at home and create your own original piece?)
MATERIALS:
- Lamp base
- Lamp shade
- 1″ wooden loose beads (30#)
- Measuring tape
- Sharpie marker or pencil
- Hot glue gun + glue sticks
- Painter’s tape
- Black spray paint
HOW-TO:
Step 1: Decide how many beads you’ll want to glue down the side, and then measure the lamp base vertically from top to bottom. (Tip: You can use a level to ensure that your lines are straight and even!)
Step 2: To attach the beads, use a high temp glue gun.
Step 3: Cover the parts of the lamp that you don’t want to get spray paint on with plastic baggies and painter’s tape.
Step 4: Spray two coats of black gloss spray paint on the lamp, letting the coats dry in between. As a reminder, always spray paint using quick sweeping motions for an even coat, and don’t get too heavy handed with it, or it could result in drips that are hard to cover.
Step 5: Let the lamp dry for a good 24 hours before topping it with a shade.
Check out Katie Taylor’s complete guide on spraypaintandchardonnay.com
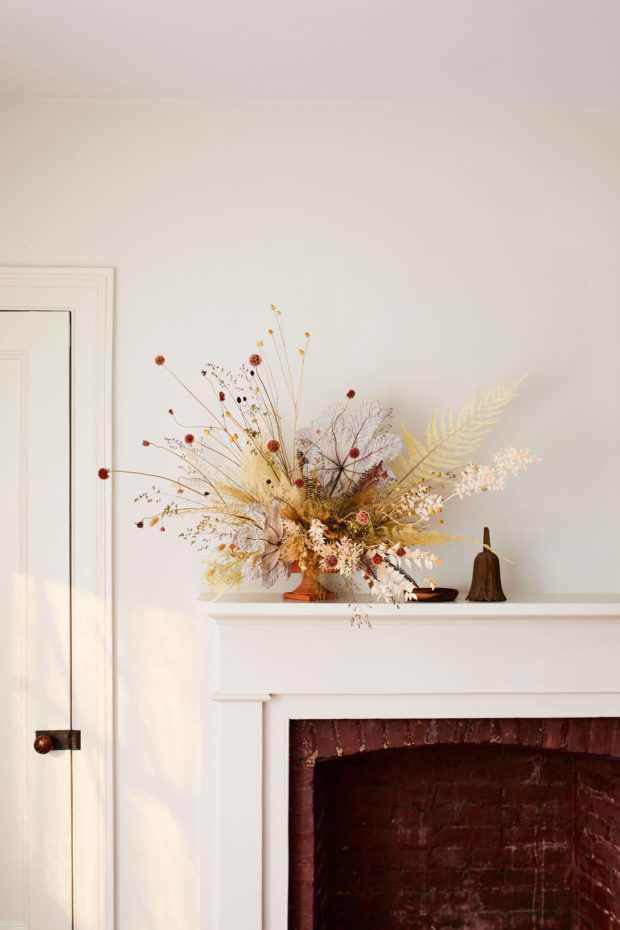
Dried Flowers à la Martha Stewart
Dried flowers can be a chic addition to your home décor; and if Martha Stewart, the Queen of Crafts, suggests it, it’s worth a shot. Before we get into the nitty-gritty, here are some must-follow Instagram accounts to get you excited.
https://www.instagram.com/p/BwB90bOlg1U/?utm_source=ig_web_copy_link
https://www.instagram.com/p/B-EfKmulSZG/?utm_source=ig_web_copy_link
https://www.instagram.com/p/B5VikZfnwOJ/?utm_source=ig_web_copy_link
MATERIALS:
- Flowers
- Clothes drying rack or clothes hangers
- Scissors
- Twine, cut in 10 to 12-inch lengths (Note: You’ll be using one piece of twine for every flower you are drying.)
HOW-TO:
Step 1: If you’re selecting your flowers from a bouquet, pull each out and separate them before stripping away any leaves, outer petals that are damp, wilted, or discolored.
Step 2: “Cut an inch or so off the bottom of the stem so that you are starting the drying process in a fresh, clean state,” says Linda Ruel Flynn, owner and designer of Flora-Ly Artisan Flower Preservation. Flynn recommends tying one end of the twine to the bottom of the stem, leaving a long tail to fasten to the drying rack or hanger. ”
Step 3: [Tie] starting at one end of the hanger, so that your flowers are hanging upside down,” says Flynn. “Tie the next flower the same way but three to five inches away from the previous flower.” Continue this process for each of your blooms, being careful to not let the flowers touch each other, as this could hinder the airing-out process.
Step 4: Place the drying rack or hangers with tied, suspended flowers in a dry area of your home and leave them undisturbed for two to three weeks. “Thicker flowers, like roses, will take longer to dry, while thinner flowers like lavender, hydrangea, or grasses will dry quicker,” says Flynn. The waiting period is the hard part but hang in there because the final result is definitely worth the wait.
Step 5: Arrange them. After three weeks, it’s time to cut your flowers down from their twine perch, being sure to pull off any excess twine during the process. “Bunch and tie them together to hang from a mirror, bunch them together and place in a dry vase, place single stems in bud vases,” says Flynn. “Any way you choose will be lovely and you will enjoy these for quite some time.”
How to keep them clean: Flynn says, “Dried flowers are prone to dust, just like everything else, so once a week place a pantyhose sock over the end of your vacuum cleaner hose and hold the hose two inches from the dried flowers and vacuum,” which will pick up any dust and cobwebs while keeping your flowers intact.